The day to day adventures of turning a 22 year old house into something updated, fun, and fresh for this family of five.

Wednesday, September 8, 2010

Accessorizing the Mural Wall

Since I plan on wrapping the mural around the wall (so you see it from the front door), I didn't mind bringing in some items and sort-of 'covering' up some of this part.


Yep.  I still haven't finished it, haha... but I will!  I definitely will.  My problem is I have too many projects going on at once around here and I hop between them.  I need to work on that.

Anyhoo.

I added this wall vinyl.


I bought it about 3 months ago, on sale.  Got it home, and couldn't figure out where to put it!  LOL.  Figures, right?

I actually REALLY like it here, so I'm glad I waited to use it.

I added back three black frames, placed in a vertical row.  The top photo is my oldest son at 2 weeks old, the middle one is my now youngest at 2 weeks old, and the bottom is BEAUTIFUL child artwork (that is irreplaceable), but will be replaced by a shot of our soon to be son when he is 2 weeks old.  :p


What's funny, is that I didn't realize that I'd gotten the photos in two different sizes.  I could always have the one of my younger son enlarged, I suppose, but for right now it is double matted to give it more presence.   My husband was joking around that our first got the big photo, the second got a smaller but still professional photo, and we'll get the third a Polaroid.   haha!  Joking of course!

The little bench I bought off of craigslist a few months back for cheap.  It's a sturdy little thing, but it does need a paint job.  I'm really at a loss when it comes to picking out a color, so it's been naked ever since I bought it.   Blue?  Red?  Green?  White... Black?   So many choices.

I removed a lot of red from my decor when we moved, but I did keep a red blanket stored away, which brings in a nice pop of fall color to this area. 


I'm thinking I need to set myself a little deadline to get this little project wrapped up!  :)

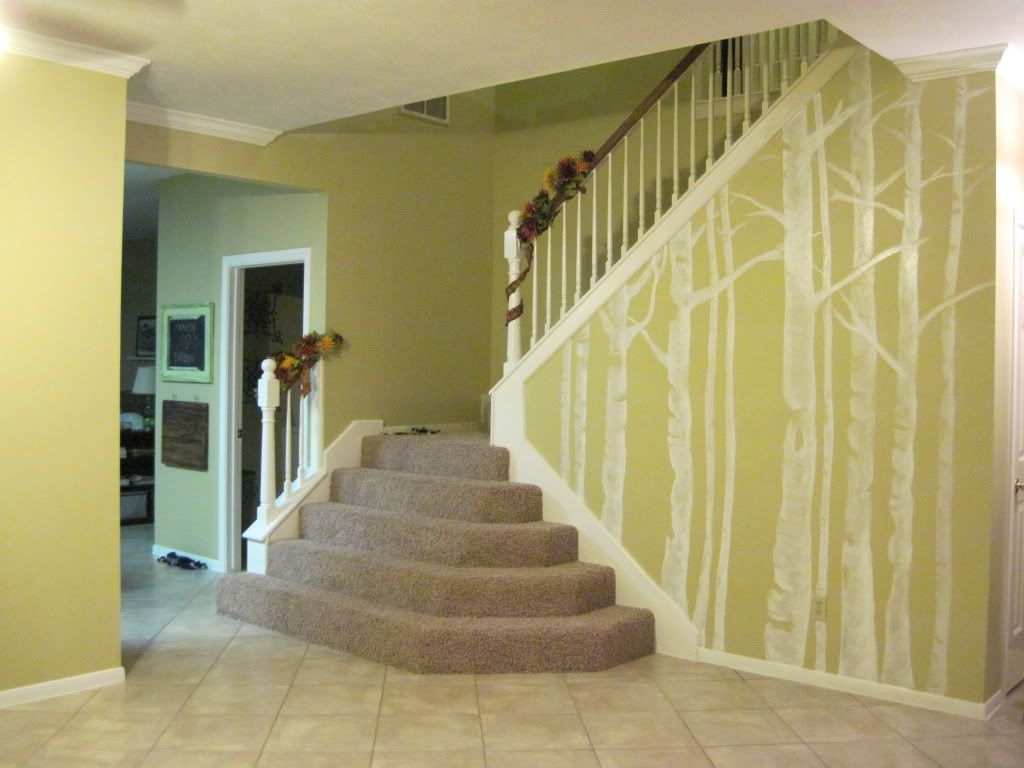
Oh, and scroll back up and take another little peek at that last photo.  Anyone want to come and finish painting that 2 story wall for me??  UGH!!!  :)   One day at a time.


Monday, September 6, 2010

At last, At last, done at LAST!

....with, the baby bedding!

So, this was definitely a learning experience, and I will probably never do it again.  LOL.  I tend to want to do everything myself, but honestly, trying to sew around the thick filling in the bumper was a nightmare.  Every time I'd pull it out to work on it, I'd mumble under my breath about how I should have bought the Nautica set on sale at Babies R Us.   BUT, I didn't, so I made myself finish, and I am SO SO SO glad to be done with it that I did.   Okay, yeah, actually... I'm just glad to be done with it. :)

Unlike those crazy moms who say to their unruly teenagers, "I carried you for 9 painstaking months," I'll be the crazy mom who says, "I sewed your, insanely difficult, baby bedding!!!"


And yes, there is a door missing from that frame. Kudos to you if you caught that. :) It is currently receiving a new coat of paint in the garage.


I completely cheated and stuck the crib skirt to the metal spring, frame thingy with industrial strength Velcro.

I used Burlap ribbon for the ties, hoping to invoke a rustic, rope like texture.


Our pretend baby  LOL:


I think he likes it!  :)


Only a  few more projects to go to wrap up the Nursery Nook!


Friday, September 3, 2010

Birch Mural, Entry Redo

Day one of the Entry Redo, Redo.  :)

Please excuse the bad lighting.  These were taken tonight, with no natural light, and very dim artificial.


So, when I left the entry last, it was looking sort of like this, at least the main stairway wall was:


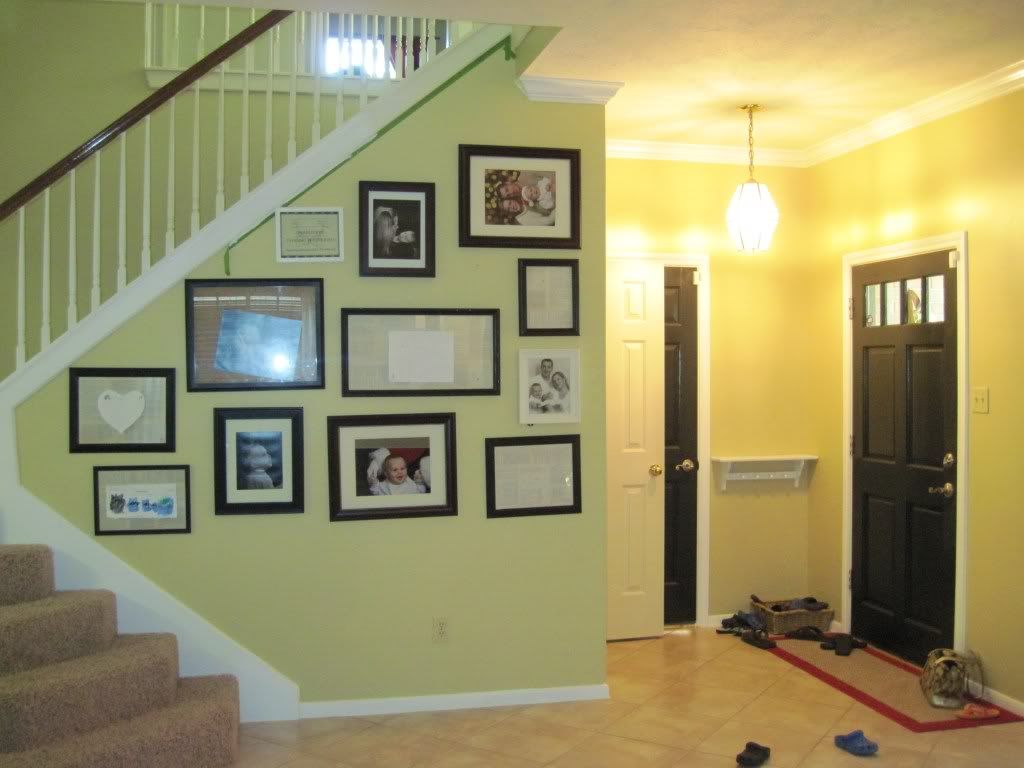
I decided, the photo wall (even considering the messed up state it was in) just wasn't going to do it for me.  I might eventually add 3 large photos back, but the rest will go elsewhere (repainted and refilled, of course).

So, first I removed the photos and was left with a clean slate looking something like so:


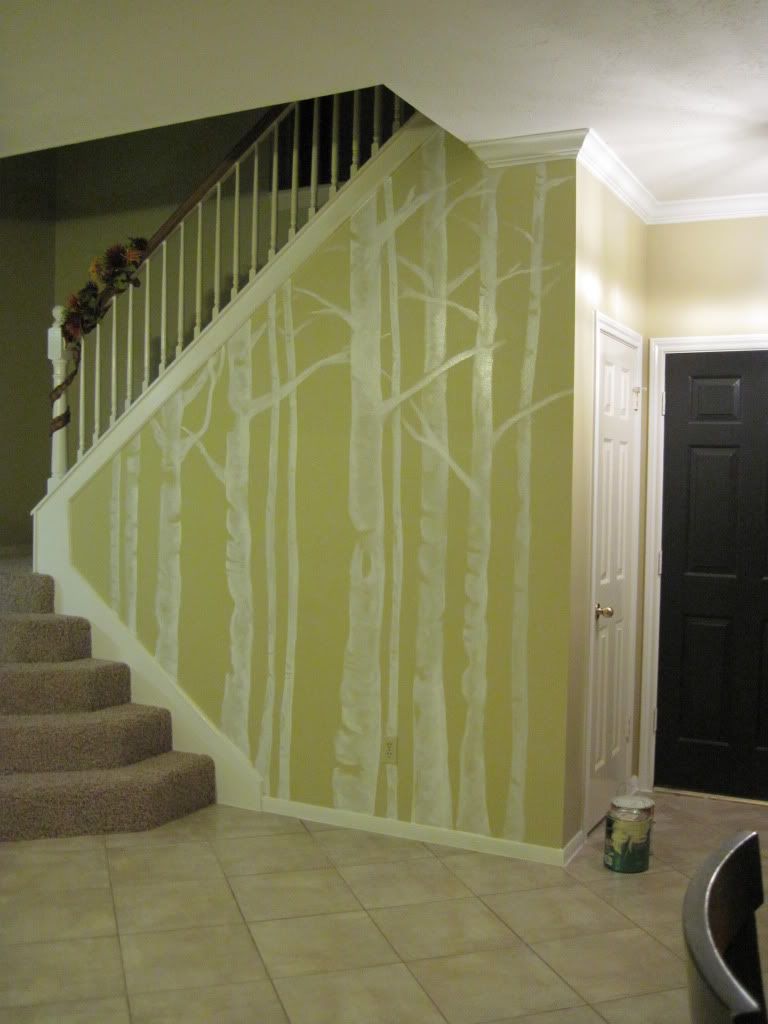
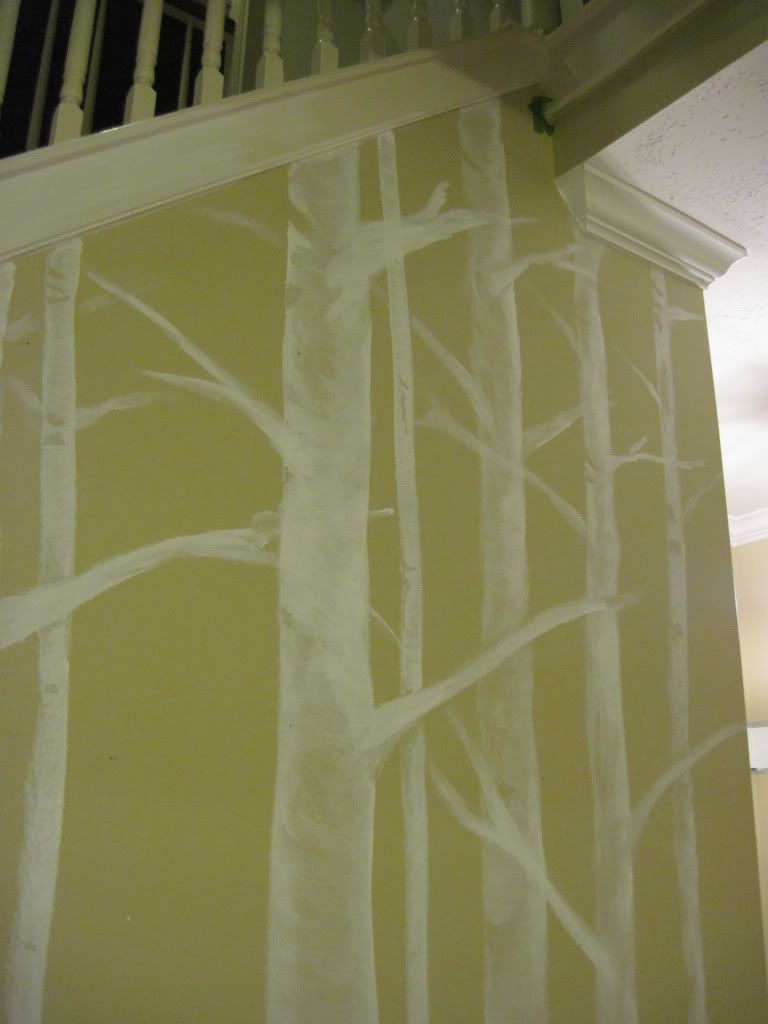
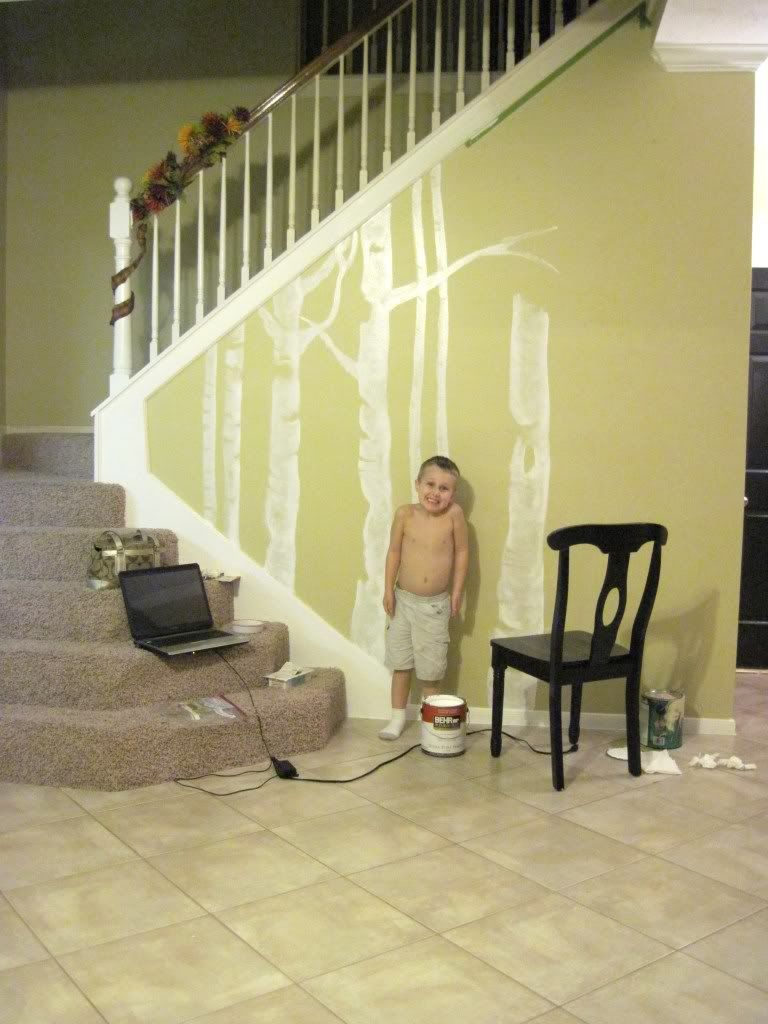
Without stirring the paint, so it was sort of soupy, I just started painting on the trees.  I then used q-tips and paper towels to quickly remove the paint to make the crevices.  I also used the natural marks left by the brush to my advantage, letting them work as bark-like texture.


I then went back and added another coat of white to create highlighting where wanted.


I plan to continue this around the entry way, but for one evening of work so far, I am REALLY happy with the way it has turned out so far.


And one with my little helper, just for good measure.  :)


Thank goodness for a perfectly timed long weekend.  Yay!  :)

Linking up to:


Funky Junk's Saturday Nite Special


Photobucket


Life in the Fun Lane
 
 
mmm button
C.R.A.F.T.
 

Thursday, September 2, 2010

Fall Mantel

Sept 2, 2010 ... Otherwise known as 90210 (hehe)
means..... Time for FALL!   :)   At least in our household.  I couldn't hold out any longer.

I spent today pulling out the black and orange rubbermaids from the garage.
Don't tell me I'm the only one who uses color coordinated storage totes!

Our new Fall Mantel:


Over the Summer, it looked more like this:


It was actually pretty simple with only a hint of Summer.


I added some ceramic pumpkins..


Some scrap decorator fabric in Fall-ish colors..


Some sticks for a little organic element..


And a cheery Happy Fall Sign.


And with that, I'm callin' it done.. at least for another month.  :)
When October hits I'll be adding in a little spooky to the mix.

Have you guys started decorating for Fall yet??


Linking up to:
Transformation Thursday @ http://www.theshabbychiccottage.net/


FAIL.

So I tried.

And, to be honest, the vision in my head just didn't match the end result.   Hmmmm.

If you're wondering what the heck I'm talking about, I'm talking about the project I spent ALL day on yesterday.  I mean, not an hour.  All. Day. Long. 

This is what I'm working with.

Let the photo sink in for a second and then I'll explain my thought process.  :)


So we've got a really tiny space for an entry way.  I envisioned two rows of hooks on that little wall where the white shelf was.   The photos: hahahah!  I hung up the frames on the big wall to get an idea of arrangement, with the plan of painting the frames to match and then putting new photos in them.   Notice right now some of the frames are empty, some are sideways, and some are upside down.  You should have seen my husband's face when I hung up the last photo and asked his opinion.  "You do know some of the photos are upside down, right?"  "Yes hunny, I might have pregnant lady fog brain, but I'm not THAT bad."

They've been like that for about 2 weeks now.  Ugh. 

I had this in the garage:


I bought this THING off of craigslist about 4 years ago and never did anything with it.  It has moved with us twice.  Hmm.  See that little leg behind it on the left side of the photo??  I was under the impression that those legs went to this THING.  However, after spending most of the day painting and distressing the thing, it turns out these legs DON'T go to the thing.   So a trip to Lowes or Home Depot will be in order, to find legs that will work.  In a way this is a blessing because this little thing is short, and I want it to be bench height to go on that wall with the photos.  So instead of living with the little short legs, I can validate buying new taller ones.

Anyway, I ended the day with this progress:

The thing is now a grayish-blue (the color is showing an awful green in this photo for some reason), with the undercoats of white and yellow showing through in places.  I plan on making a cushion for the top, to make it into a real sit-able bench.

And then I did this to the wall, which I now hate.


I think I mainly hate the blue stripe around the white.  In my head I thought it would look charming, but it really just looks like it should belong in an 8 year old's room.   I really love the gray-blue that everyone else loves in much of blogworld, but I just can NOT seem to make it work in my house.   The good news is, I have a PLAN.  It will involve deconstructing much of what I did yesterday, but I think the final product will be worth it.   Hopefully.  I know it!  :)


Wednesday, September 1, 2010

Today's activities

I've decided to start another project around here, because.. you know, I have NOTHING else going on, and absolutely NO other projects to finish up.  

Okay, well you guys know that isn't entirely accurate.  *Insert one of those famous blushing smiley faces here*

So what am I going to be working on??

Trying to turn our really non-existent entry way into something that will work for our family.  We currently have a basket overrun with shoes, a doormat to catch dirt, and a shelf with pegs that falls off the wall every time I try to hang something on it.   Yeah.  It ain't workin'.

I have mega dreams of a phenomenal, knock your socks off entry.

Oh the organization...

Pottery Barn

I'd love to NOT be embarrassed when we have unexpected guests.

Domino
haha.

I really just want something beautiful.

Landry & Arcari

Or, you know... somewhere nice to decorate for the Holidays.

Good Housekeeping

Dreamy eh? But see, my issue here is budget.  I have exactly this much to work with:  $0.

haha!   Yep.  ugh.  Can you say broke?  Perhaps you've noticed my addition of Google ads to try and make maybe 5 bucks a month? haha.   I need something to fuel my decorating obsession!!!

So why even start this new project?  Well, I have a few things in the garage I think I can re-purpose, some left over paint from other projects, and perhaps not the Know-How, but a Major-Want-To.  I also now have a school aged child, and we NEED some organization in our lives.

We'll see how this goes.

I shall check back later with progress!  ..... hopefully.   :)  Hope you all have a fan-tabulous day!