The day to day adventures of turning a 22 year old house into something updated, fun, and fresh for this family of five.

Wednesday, May 19, 2010

Awesome husband.


So, see these two bushes... okay, well one bush and one stumpy dead thing..  well, I've wanted them gone for quite some time.  They prohibit you from seeing the front door from the street, which I find extremely unwelcoming.   From a practicality standpoint, it also makes it a big pain getting out of the car and walking to the porch.   I have to sqeeeeeze by the car and try not to get in the dirt.   So, my plan has been to somehow rip out these two items, and extend the walkway out, so that I can actually get out of the car and step onto stones rather than dirt.

So why is this called Awesome Husband?  Because I walked outside to see my awesome hubby doing this:


haha, gotta love his glasses sliding down his nose like an old man.  :p   Anyway, doesn't it just really open up that entry?


I can't wait to find some really nice flagstone, or pavers, or slate (the possibilities are endless!) and create that extended walkway.
So.  Excited.   =)


Tuesday, May 18, 2010

Big, Giant, Cardboard letters


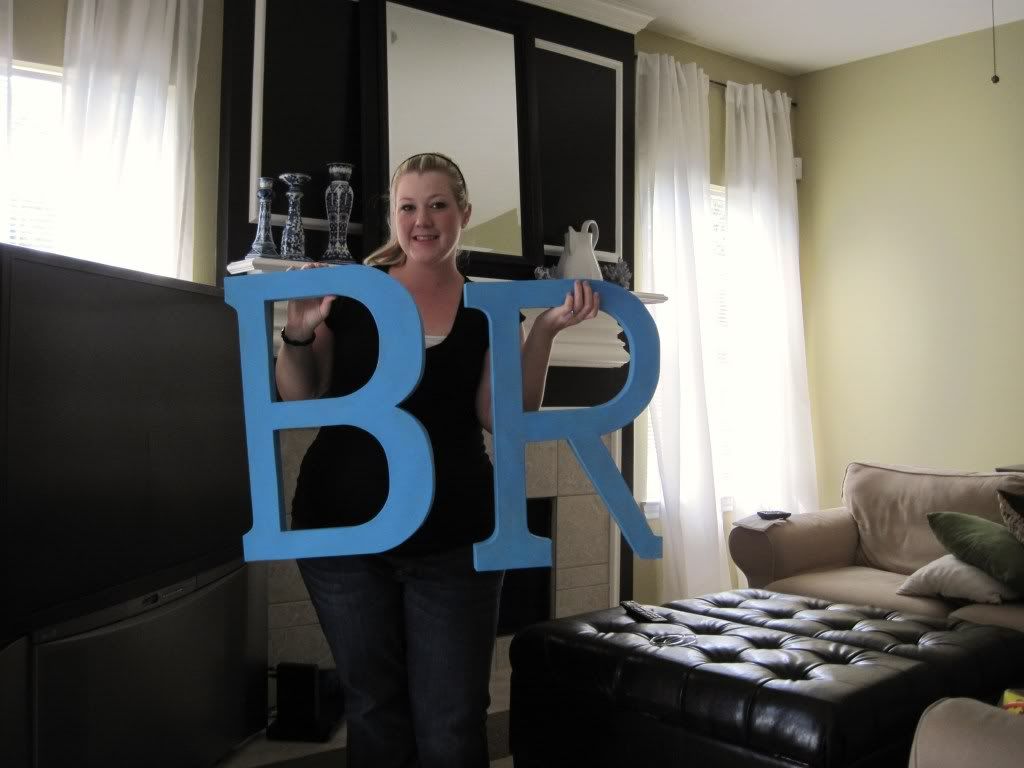
My husband and I were strolling through JoAnn's the other day on our date night (gotta love a man who will walk through a fabric store with you, rather than going to a movie!)... we came across these awesome Big, Giant, Cardboard letters.

I painted the letters a blue to match dresser in the boys' bedroom. 


I love love love this dresser.  My mom and I picked it up from the AS-IS section of IKEA, for about $100 off the retail price.  *SCORE!*   :)   A bonus is that it is actually real wood.
and... it has these adorable yellow striped drawer liners.


So after painting the letters blue with plain jane craft paint, I attached these sticky photo hangers to the back.


Before: 


and...... WALA!


Total paid:  $8.95 per letter and leftover craft paint: free.   For less than $20, a new look to their walls.  :)Have a great week!

Wednesday, May 12, 2010

Windows...

If I had my way, and an unlimited budget, I would LOVE to deck out our windows in beautiful, crisp white, plantation shutters.   BUT, at $150-$400 + per window,  ha.    hahahah.    hahha.  yeah.   That's not happening.

Currently we have really tacky, 1 inch vinyl mini blinds on all of our windows.  Some are broken (NICE!) but all of them are UGLY.

Replacing all of our blinds with 2 inch wood or faux wood versions would be a cheaper option, and I considered that too, but when you have SO much to do to a house, and SO much you still want to buy to furnish said house, even $40 a window can add up.

SO, having said all of this, I want to share with you what I found at Target. 

Look at that price!  WOW.  I'm normally more of a fan of white blinds, but I think these add a natural element that is quite nice.   Now, I did check these out in the store first, and they are NOT faux wood.   Imagine your normal 1 inch vinyl blinds, made into 2 inch.  They are very thin, and when opened to let the light in, you can tell they don't have the thickness of wood or faux wood.   However, for that cheap, I'm willing to have a thin blind. 

I've installed two already, and they look SO great.  I'm not recommending these if you want blinds that look like wood.  They don't.  Well, they sort of do... a thin wood.  BUT, I love them!  I have a 23 inch window on each side of a 35 inch window in my breakfast area.  Gotta love that I was able to buy blinds for all three windows for the price of ONE faux wood blind at Lowes. 


Next step- some sort of window treatment for the top of those windows, which I'm thinking I'll make out of burlap.  Stay tuned for that adventure!


Tuesday, May 11, 2010

Green, Green, Everywhere.

Gotta love Spring.  While I know it is already technically Summer, around these parts it hasen't yet reached 100 degrees, so it still sort of feels like Spring.  

I always get the itch to change things up outside when the weather turns nice. 

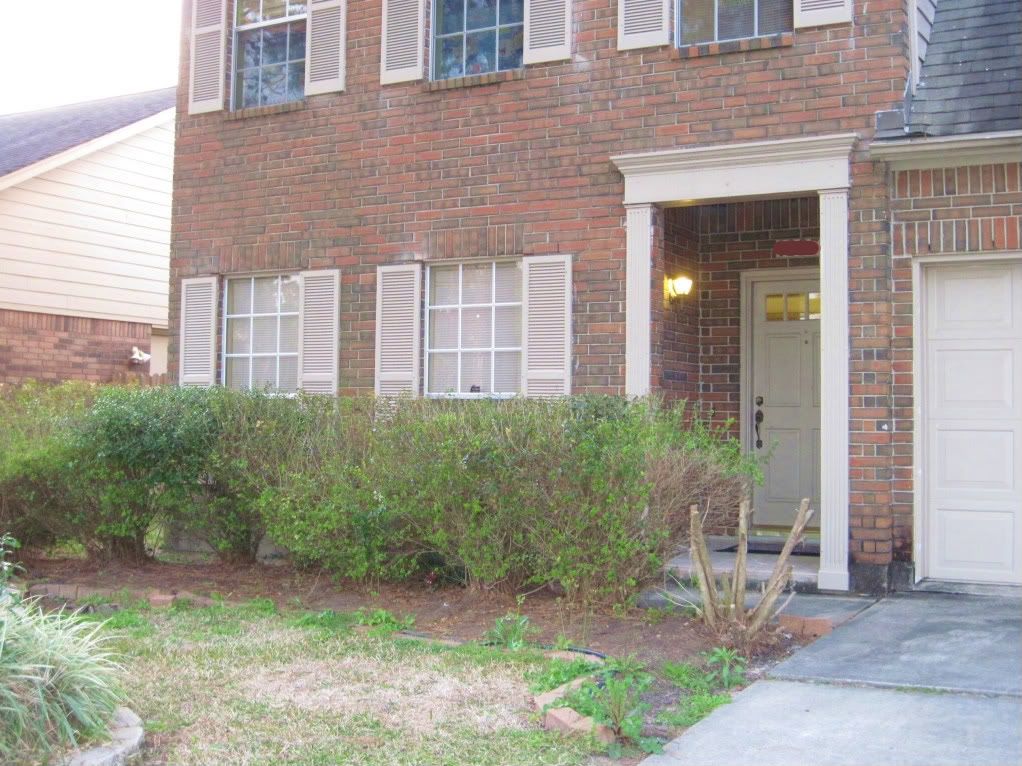
And since this is what we inheirited, we have a lot that needs changing.


I'm not a big fan of little circle islands around huge trees.  I think they need something more substantial, so I spent 2 afternoons getting rid of those circles (I am pregnant here!  lol).   The little red bricks I sort of like (they're there and free), I just didn't like where they were, so I also moved them, along with matching bricks creating little circle islands around trees in the back yard.   I arranged the red bricks in a bigger bed to include the two trees.   I removed most of the sod in the bed, and covered the whole area with several layers of newspaper with mulch on top.  

If you've never tried this method, it is a super easy way to create a flowerbed.   At our old home, I actually never removed the sod.  I just layed down the newspaper down directly over the grass, and covered with mulch.  The effect was a smothering off the grass since it was getting NO sunlight.   Within a few months, the paper and grass had composted into some wonderful planting soil.  

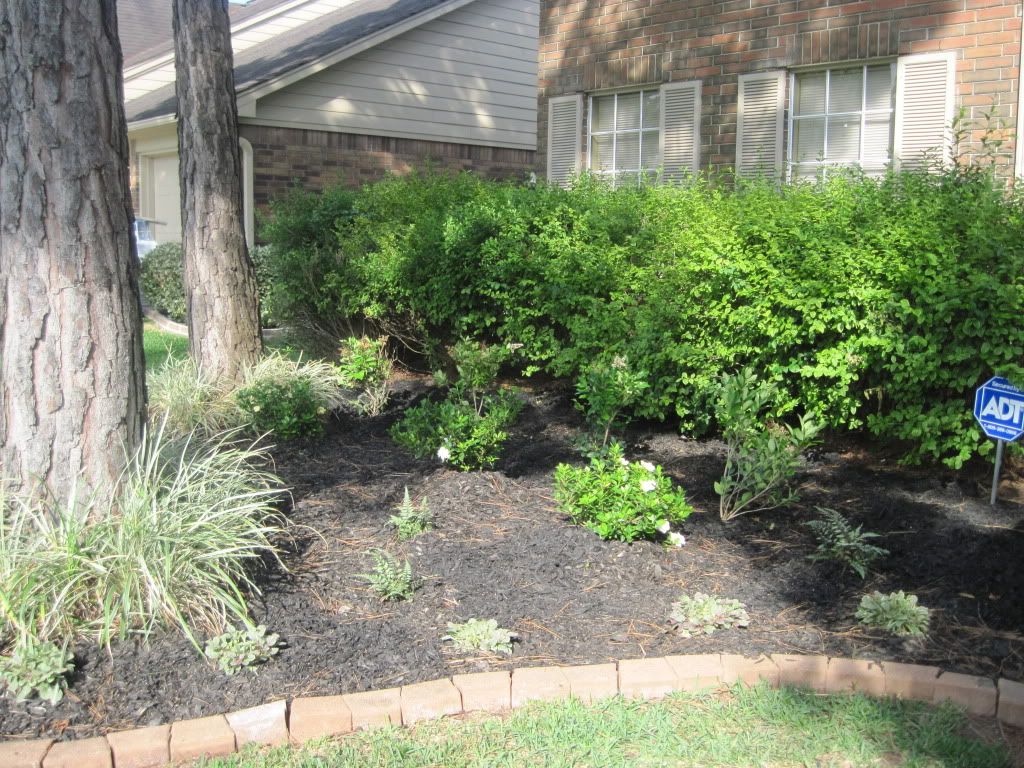
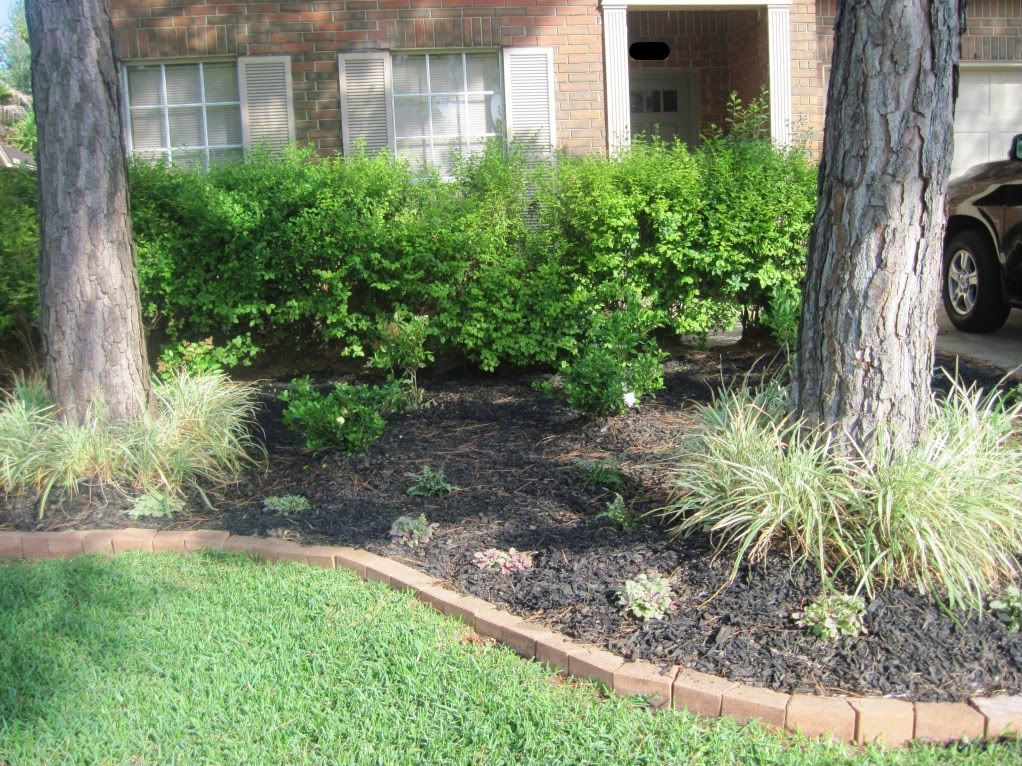
Anyway, after several days of hard work, this is what I came up with.  It still isn't perfect, the old bushes need to be trimmed up and the new plants are small, but they'll grow into nice mature sizes in a year or so.  Since the ornamental grass around the left tree was pretty much dead, as seen in the first photo, I divided up the HUGE groupings of grass around the right tree and did a little 'Spreadin' the Love around.' 


The small plantings in the front should grow to have an 18in spread each, and the ferns behind and throughout the bed should grow to about 2 ft tall.   Hopefully when everything grows in it will look less bare.  :)

Hopefully soon we can finish up our curb appeal with some fresh paint on the shutters and trim.

Have a great day!


Sunday, May 9, 2010

Happy Mother's Day, Ya'll! :)

I hope everyone had a great day with their families.  This afternoon/evening, we drove down to Galveston Island and did a little shopping and grabbed dinner.

If you ever visit the island, a must visit is Murdoch's Bathhouse on Seawall Blvd.  See info HERE .  It is a large giftshop with some of the COOLEST beach-y items, at REALLY cheap prices.   I mean, adorable starfish for only about $3.   Coral of all shapes and sizes for a variety of prices, meaning even someone on a really cheap budget can find some.  Awesome.  You can even buy a beer and relax on their deck ON the ocean...  the whole place is on piers out over the Gulf.   I of course, did not indulge in the beer since I am carrying a wee-one. 


I did, however, do a little Mother's day shopping for myself, and this is what I picked up:

One of those adorable starfish

an awesome blue coral


and an ADORABLE platter with the cutest two crabs


I can't wait to give everything its own special little place in our home.

Hope your day was just as great!


Thursday, May 6, 2010

Entryway

I'm not sure about you, but I think this is just about the best thing ever.

photo courtesy of cottage living


I actually have a wall that I think this look would look GREAT on.

I EVEN have a pew available for me.  It is actually from the church that I was baptized at, at 12 years old, which I think makes it even more special.  The only downside is that my pew is sort of long, considering the size of my wall, my husband hates it, LOL, and it has more of a 70s look to it than the rustic pew in the above photo.   --modern lines, dark finish, gold carpet type cushion.  YIKES!  lol
I'm pretty confident that I can sand off some of the dark finish, and I can of course recover the cushion to something that resembles more of a burlap bag - wouldn't that be fabulous?  However, I can't make it shorter, or easily change the shape.  Hmm.  I'll be measuring my wall very soon and reporting to my step-mom who currently has the pew (she hates it!) lol. 

Back to the inspiration photo:

I LOVE the look of the ledge, combined with the coat hooks.  What a great place to display family photos, without creating the typical family gallery you normally see next to stairs - all about being different here!  The big chunky hooks contrast so nicely with the white trim, and I think it would be so simple to make our own version of that.  Gotta love how some of the photos are hung on the wall, while some are resting on the ledge.   LOVE it.


The secret..

The secret to having it all, is knowing you already do.   


I saw that saying as one of those vinyl wall quotes that have become so popular.   So true. 

I think I might get this to use in our family room.   I'm pretty sure we can all use a daily reminder of how lucky we are.   :)

Tuesday, May 4, 2010

Bon Appetit!

So, remember about a month ago when I posted about updating the kitchen photos?  Well, here I am!  haha.

I am determined to be better about updating; afterall, I created this blog as something I could look back on when this house was 100%, perfecto, finished.  If I don't update, I'll have a whole lot of NOTHING to look back on! 

Looking back, I never posted a photo of my bin pulls!  Ignore the countertops.  I am REALLY hoping to get those updated soon.   **Chant with me, Comeeeee on Homebuyer Tax Credit!!!**  :p


So I ended up painting the back of the cabinets a very soft blue grey.   I'm now rethinking that color choice since I didn't buy new white dishes as planned.  I thought white dishes would really make the blue pop and would bring out that cottage-coastal look I'm going for..  BUT, it just isn't looking right with the black cabinets.   I'm debating painting the beadboard at the back the same color as the walls, a nice soft golden green.  I think it will show up better than the grey/blue, and will look great against my cobalt blue and white dishes.


Notice the blah-ness of the cabinet to the right?  Not really what I'm going for.  The messy painting in the cabinet to the left isn't really what I'm going for either, haha.  It is actually painted the same blue/grey currently, and is patiently awaiting these inserted into its doors, waiting in the garage:


I LOVE glass front cabinets, and these TWO sheets of glass were less than $8, using the glass cutting department at Lowes.   It was super easy to do.  I just took a drill bit and a jig saw to the cabinet door (wish I had a photo to show you, but alas...), and very carefully cut out the center panel.  I measured what size glass would be needed, took the measurements to Lowes, and had them cut both panels from one sheet of glass- hence the low price!  Awesome!

One thing you'll learn about me if you follow this blog at all, for any significant length of time, is that I have a MAJOR problem with leaving things as they are for long.   Case in point:  I've rearranged our family room twice now since we moved in a little over a month ago.   I blame this habit on not quite finding the perfect fit yet.   When I get happy with a look, I do tend to leave it for a little bit longer.  :D

Another example:  Remember those dishes?


Well, I still have the dishes out.  In fact, since I have a LOT of blue and white china items, I've decided to carry that look throughout the house.   What I did change is the arrangement, and I added some really great baskets I picked up today at Hobby Lobby.  I measured before we went, and boy do they fit!  LOL.  There isn't really much breathing room, so I'll have to store some items in there that we won't be accessing often. 

I think it looks great!


The texture of those baskets is great, and really adds another element of interest, along with the clear glass, blue glass, and combination blue and white dishes.

A sneak peek at our breakfast area:


We've added the beadboard, but we're still lacking so much.  I'd LOVE to get a new, smaller table and move this hugenormous thing to the formal dining room where it belongs (with leaf and more chairs of course).  I just have to talk Mr. Husband into letting me find a new table.  Don't tell him, but I've actually found one I LOVE for very cheap.   We're talking $300 for table, cute little farmhouse bench, and 2 chairs... not too shabby.   We also need window treatments... which I bought and then second guessed myself when my mom pointed out that they'd cover up the beadboard.  Hmm.   Oh, and the light fixture.  While I'm not that crazy about it, it is actually one of the best looking fixtures we currently have in the house, ha! 


The 80's called:  They want horrible glass and brass fixture back!  haha, pretty sure a Nasa engineer was responsible for the hanging of that lamp.  It is within a cm of being hit by the door, but skims by.  Now THAT is talent.


More to come!